Using PresellCod. A step-by-step guide for dr.cash affiliates. How to build forms, import and edit landing pages, generate Google Ads assets, and publish to WordPress — in a single, repeatable workflow.
PresellCod is a single workspace where Dr.Cash affiliates prepare everything a cash-on-delivery campaign needs: the lead form, the landing page, the Google Ads assets, and the publishing step. Instead of moving between separate tools, code editors, and freelancers, you complete each part inside one dashboard.
The goal of this guide is practical: it walks through the platform screen by screen, using real examples, so a new affiliate can follow along and an experienced media buyer can speed up an existing process.
Why affiliates use it:
- Faster campaign launches — forms, pages and ad assets come together in one sitting instead of across several days.
- Less technical work — the technical parts (API wiring, page structure, asset formatting) are handled for you, so coding is not required.
- More time for testing and optimization — with setup out of the way, more of your time goes to testing creatives and scaling what works.
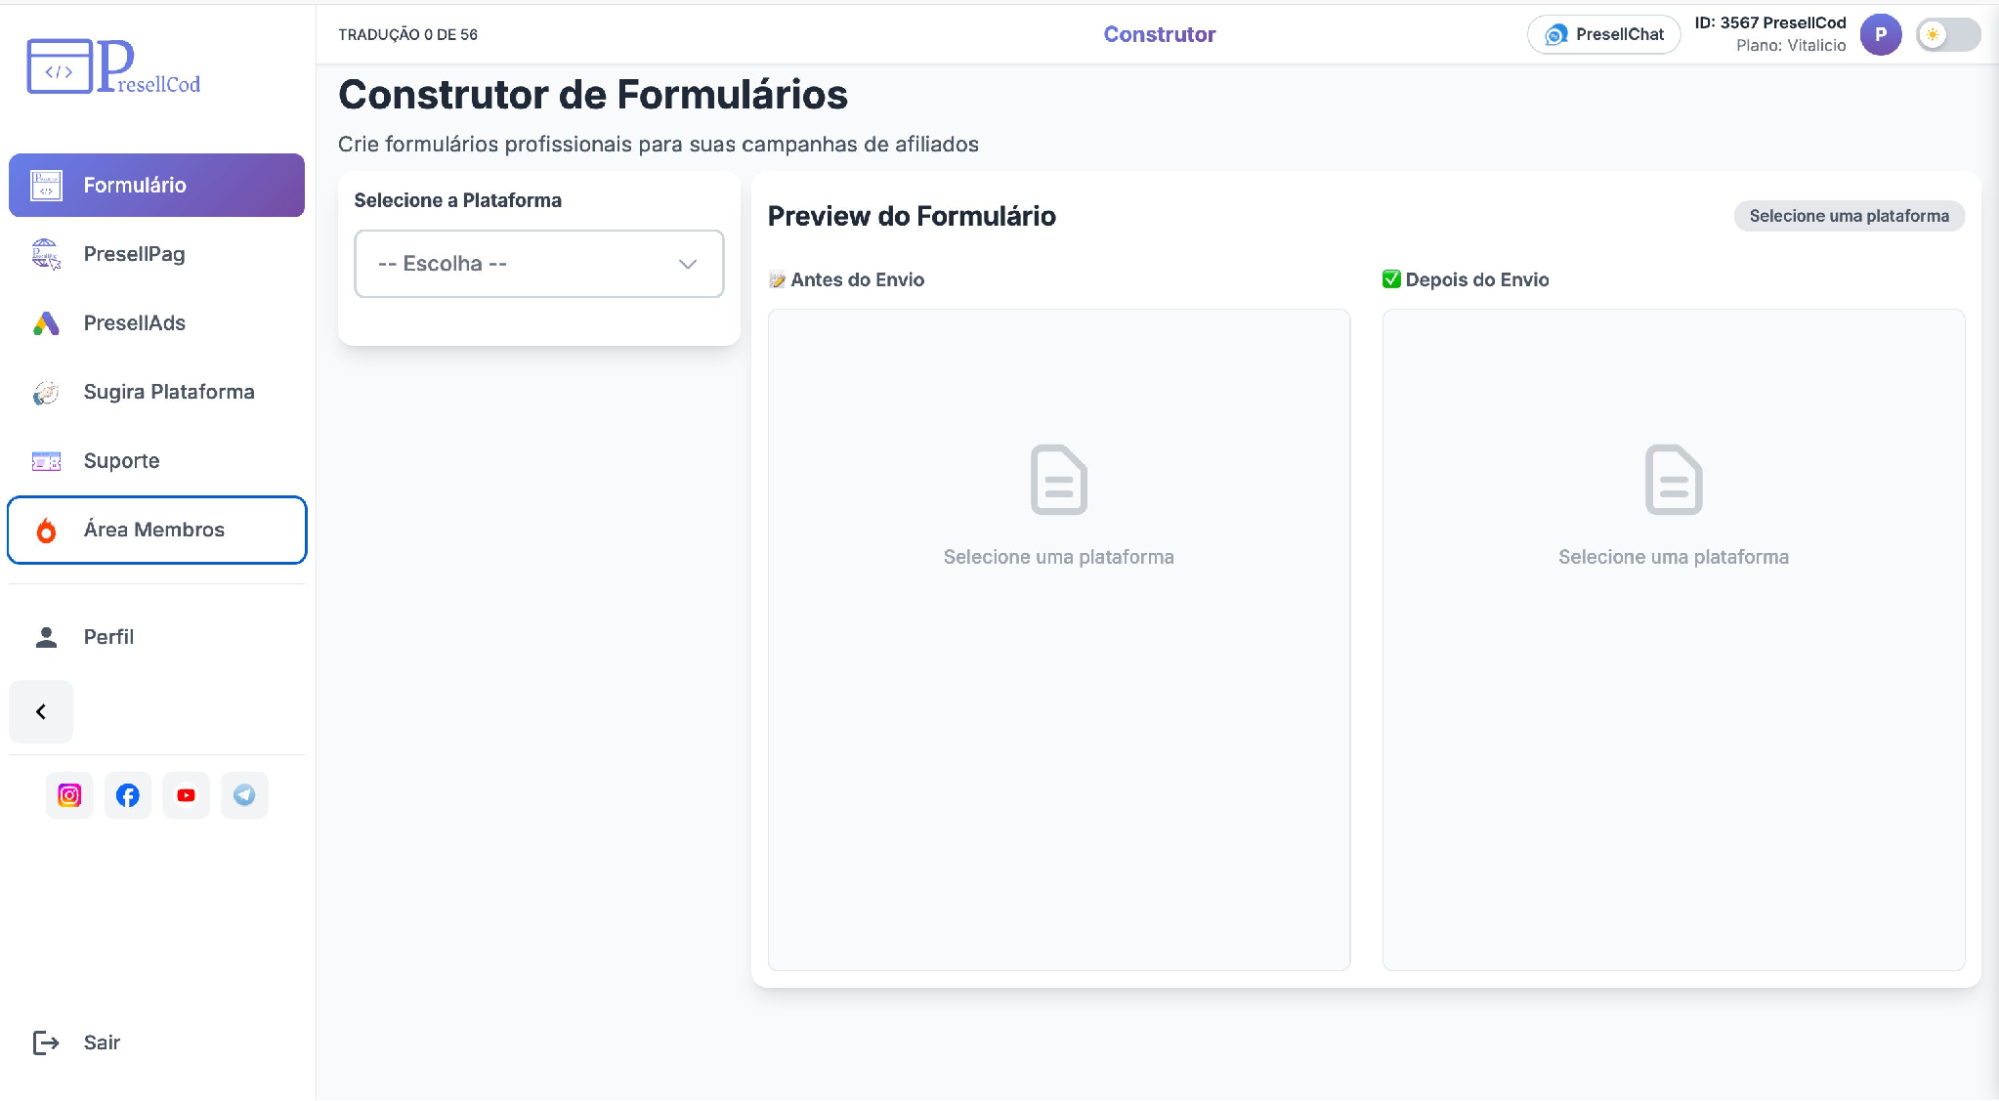
After logging in, you land on the dashboard shown below. The left menu holds the main areas you will use in this guide: Form (Formulário), PresellPag, PresellAds, and Profile (Perfil), where the WordPress and MCP connections live.
STEP 1
Create an API form
The Form Builder (Construtor de Formulários) creates a lead-capture form already wired to the affiliate platform's API. You choose the network, fill a few fields, and the form is generated for you.
How to do it:
- Select DrCash from the platform dropdown (Selecione a Plataforma).
- Choose the country using the two-letter country code (for example, US) and pick the language.
- Configure the offer settings — enter the campaign ID (Código da Oferta / ID da Campanha) for your Dr.Cash offer.
- Customize the appearance under Personalização: adjust text and button colors so the form matches your page.
- Generate the form — the form is built from these settings, ready to use.
In the example below, DrCash is selected, the country is set to US, and the language is English. The required fields appear automatically once the platform is chosen.
The Form Builder with DrCash selected and the required fields filled in.
|
Why this saves time Building a form by hand normally means writing code, connecting it to the network's API, and testing the integration. Here the fields and the API connection are produced from your selections, so a working form takes minutes instead of a development cycle — and the same steps apply to every Dr.Cash offer you run. |
STEP 2
Preview and validate the form
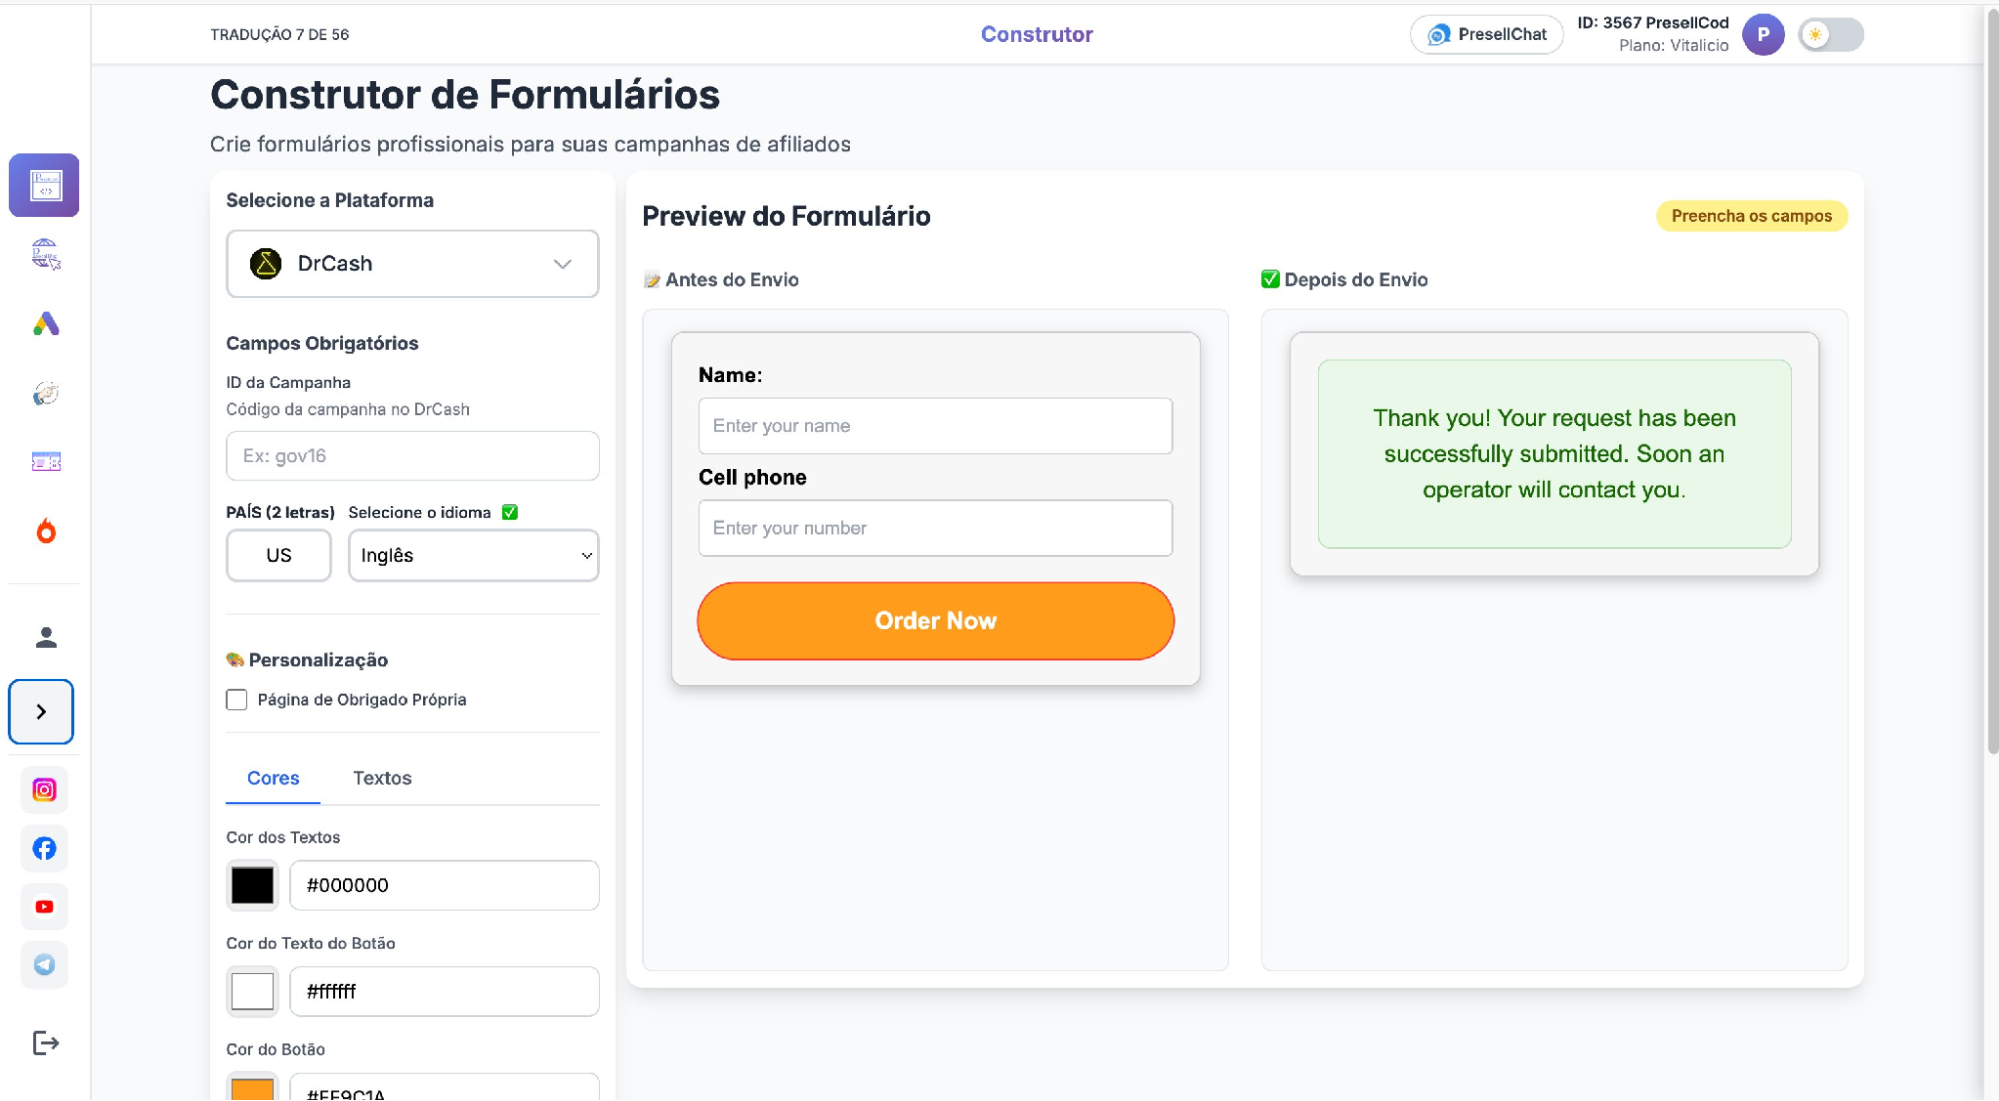
Before using the form, check it in the live preview (Preview do Formulário). This lets you confirm everything looks and behaves correctly without leaving the builder.
What to check:
- Test the form — the preview shows two states: Antes do Envio (before submission) and Depois do Envio (after submission). Confirm both display as expected.
- Check the layout — review spacing, colors, and the button against how it will sit on your landing page.
- Validate the fields — make sure the name and phone fields are present and labeled correctly for your market and language.
In the example below, the left side shows the form a lead fills in, and the right side shows the confirmation message that appears after submission.
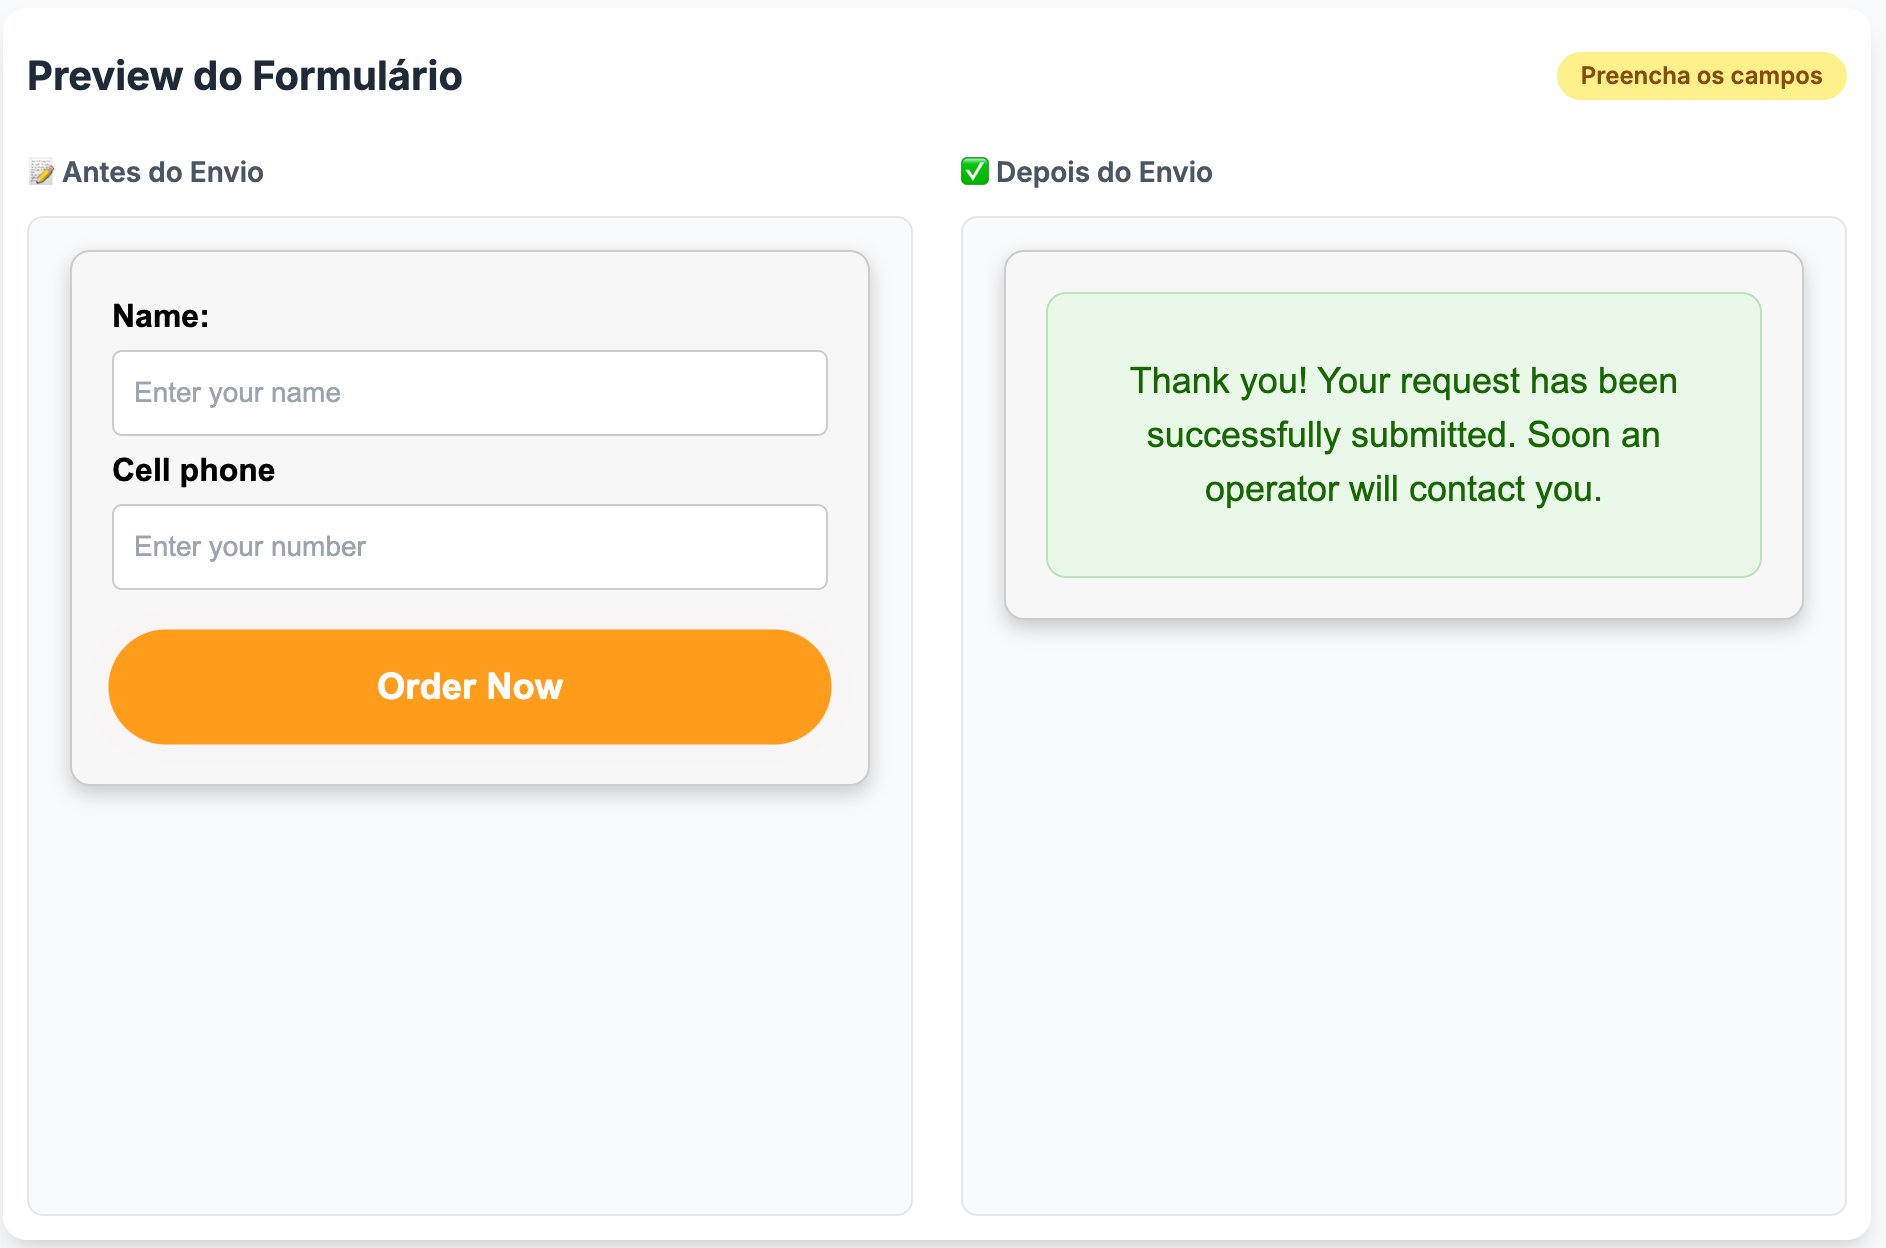
The live preview — “Before submission” on the left, “After submission” on the right.
|
Why this matters: Validating in the preview means you catch layout or field issues before the form is live, instead of discovering them after traffic is already running. For experienced buyers, this is a quick final check; for beginners, it removes the guesswork of whether the form is set up correctly. |
STEP 3
Import landing pages with PresellPag
PresellPag (Editor de Páginas COD) lets you bring in a landing page from your affiliate network and edit it directly, without rebuilding it from scratch.
Importing a page:
- Paste the template link from the network (for example, a Dr.Cash template URL) into the Colar field at the top.
- Give the project a name when prompted (Nome do Projeto), then confirm with Importar.
- Run Importação Completa — the full page, including images and layout, is downloaded into the editor.
In the example below, a project is being named before import.

Naming a project before importing a Dr.Cash template into PresellPag.
Editing the imported page
Once imported, the page opens in the visual editor. From here you adjust it to your offer:
- Edit the content (texts) — update headlines, benefits, and the call to action.
- Change images — replace product shots and visuals as needed.
- Change the form — connect the lead form to the right Dr.Cash offer.
- Update links — point buttons and links to the correct destination.
The example below shows an imported eye-health page open in the editor, ready to edit.
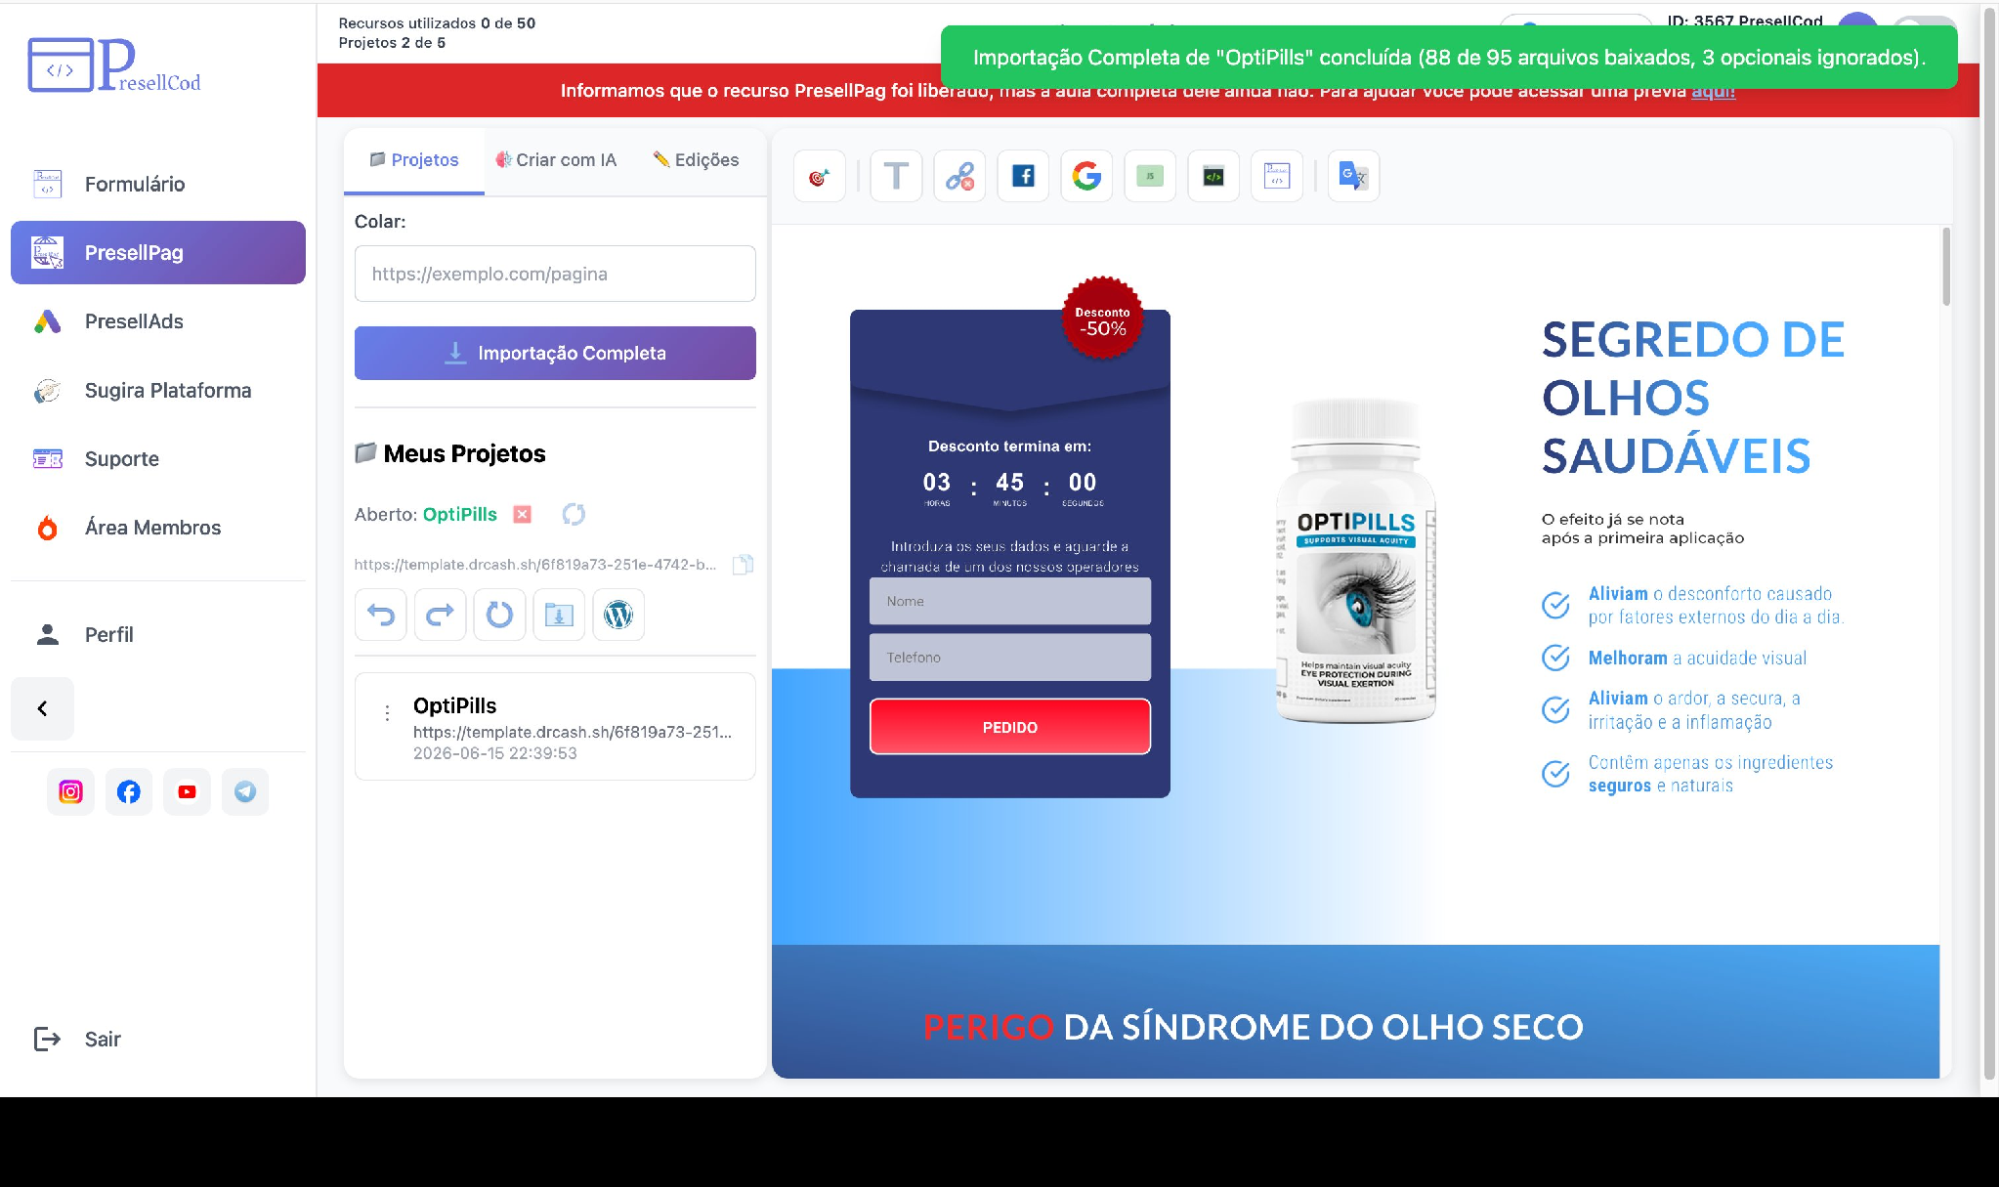
An imported landing page open in the PresellPag visual editor.
|
Why this is fast Starting from a proven network page means you adapt rather than build. You keep a structure that already converts, change only what your offer needs, and avoid the slowest part of a launch — creating a page from nothing. |
STEP 4
Generate Google Ads assets with PresellAds
PresellAds (PresellAds para Google Ads) prepares the asset set a Google Ads campaign needs. You enter the product details once and the assets are drafted for you.
What it generates:
- Keywords — relevant search terms for the product.
- Headlines (Títulos) — multiple ad headline options.
- Descriptions (Descrições) — ad description variations.
- Sitelinks — additional links for the ad.
- Structured snippets (Snippet estruturado) — structured snippet sets to highlight features.
- Multilingual generation — assets prepared in the language you choose, useful when running the same product across different markets.
In the example below, the product details and offer table are filled in on the Dados do produto tab, with the asset tabs (Keywords, Headlines, Descriptions, and more) along the top.
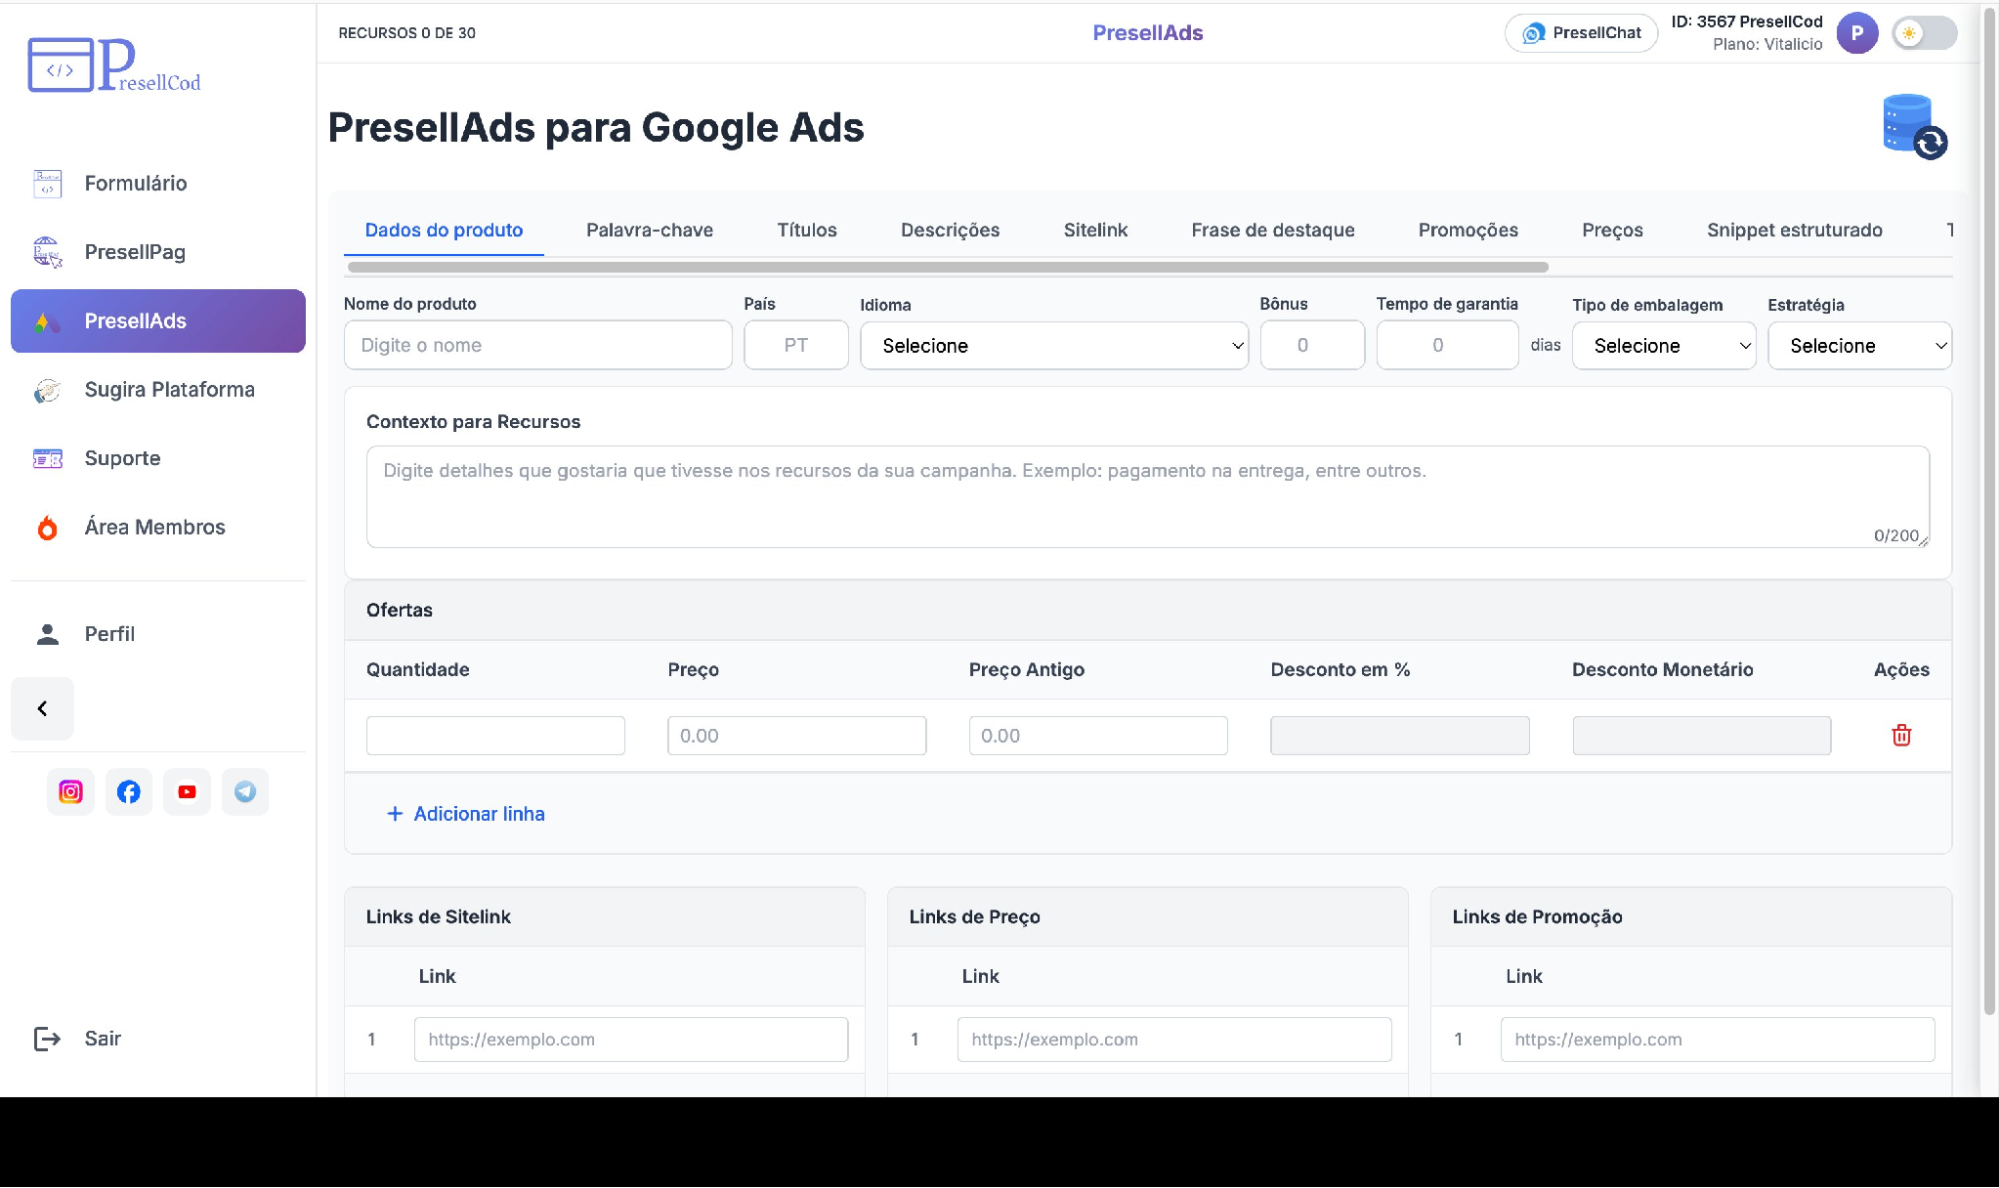
PresellAds — entering product data to generate the Google Ads asset set.
|
Why this reduces manual work Writing keywords, multiple headlines, descriptions, sitelinks, and snippets by hand — and then translating them for each market — is time-consuming. PresellAds drafts the full set from one input, so you spend your time reviewing and refining rather than writing everything from a blank page. |
STEP 5
Publish to WordPress
When the page is ready, publish it to your own site through the WordPress connection, found under Perfil → Conexão.
How to publish
- Connect WordPress — install the PresellCod plugin on your site, then use Conectar novo WordPress and paste the temporary code to link the domain.
- Export pages — once connected, send your finished PresellPag page straight to the site.
- Publish faster — connected domains and the pages you have exported are listed in one place (Domínios conectados), so you can track what is live.
In the example below, a domain is connected and shows the pages already exported to it.
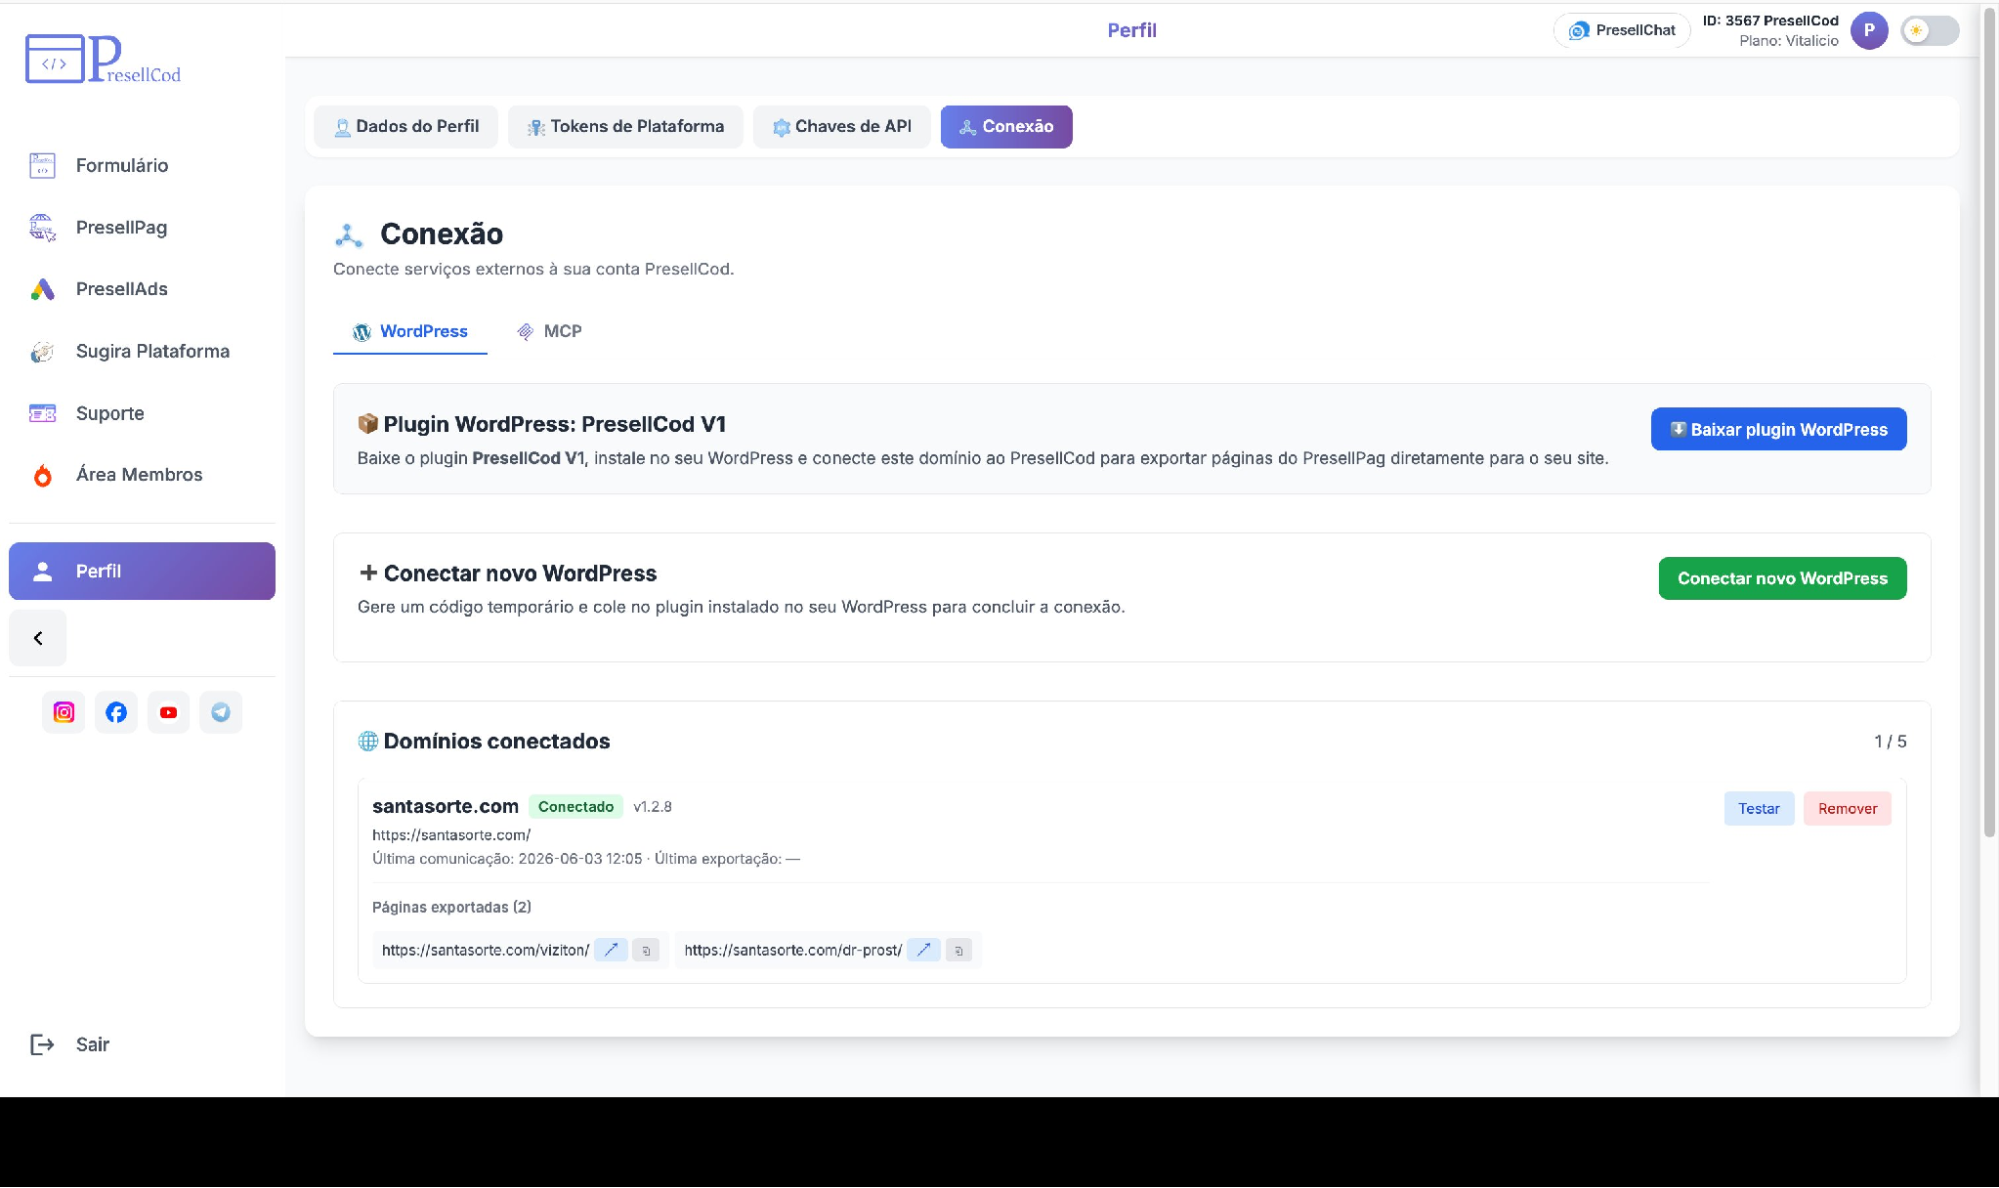
The Conexão screen — a connected WordPress domain with its exported pages.
|
Why this is quicker Exporting directly to WordPress removes the manual steps of downloading files and uploading them to your site. The page moves from the editor to a live URL in one action, which shortens the gap between finishing a page and being ready to send traffic. |
STEP 6
Use AI through MCP
MCP (Perfil → Conexão → MCP) connects an AI assistant to your WordPress so you can create and edit pages by describing what you want. The AI then performs the hands-on editing.
How it works
- ChatGPT integration — connect ChatGPT (Codex) to your site.
- Claude integration — connect Claude (Desktop or Claude.ai) to your site.
- AI-assisted workflows — once MCP is enabled in the plugin, you describe a change in plain language and the AI applies it to the page.
In the example below, the MCP tab shows the connection options for an AI assistant.
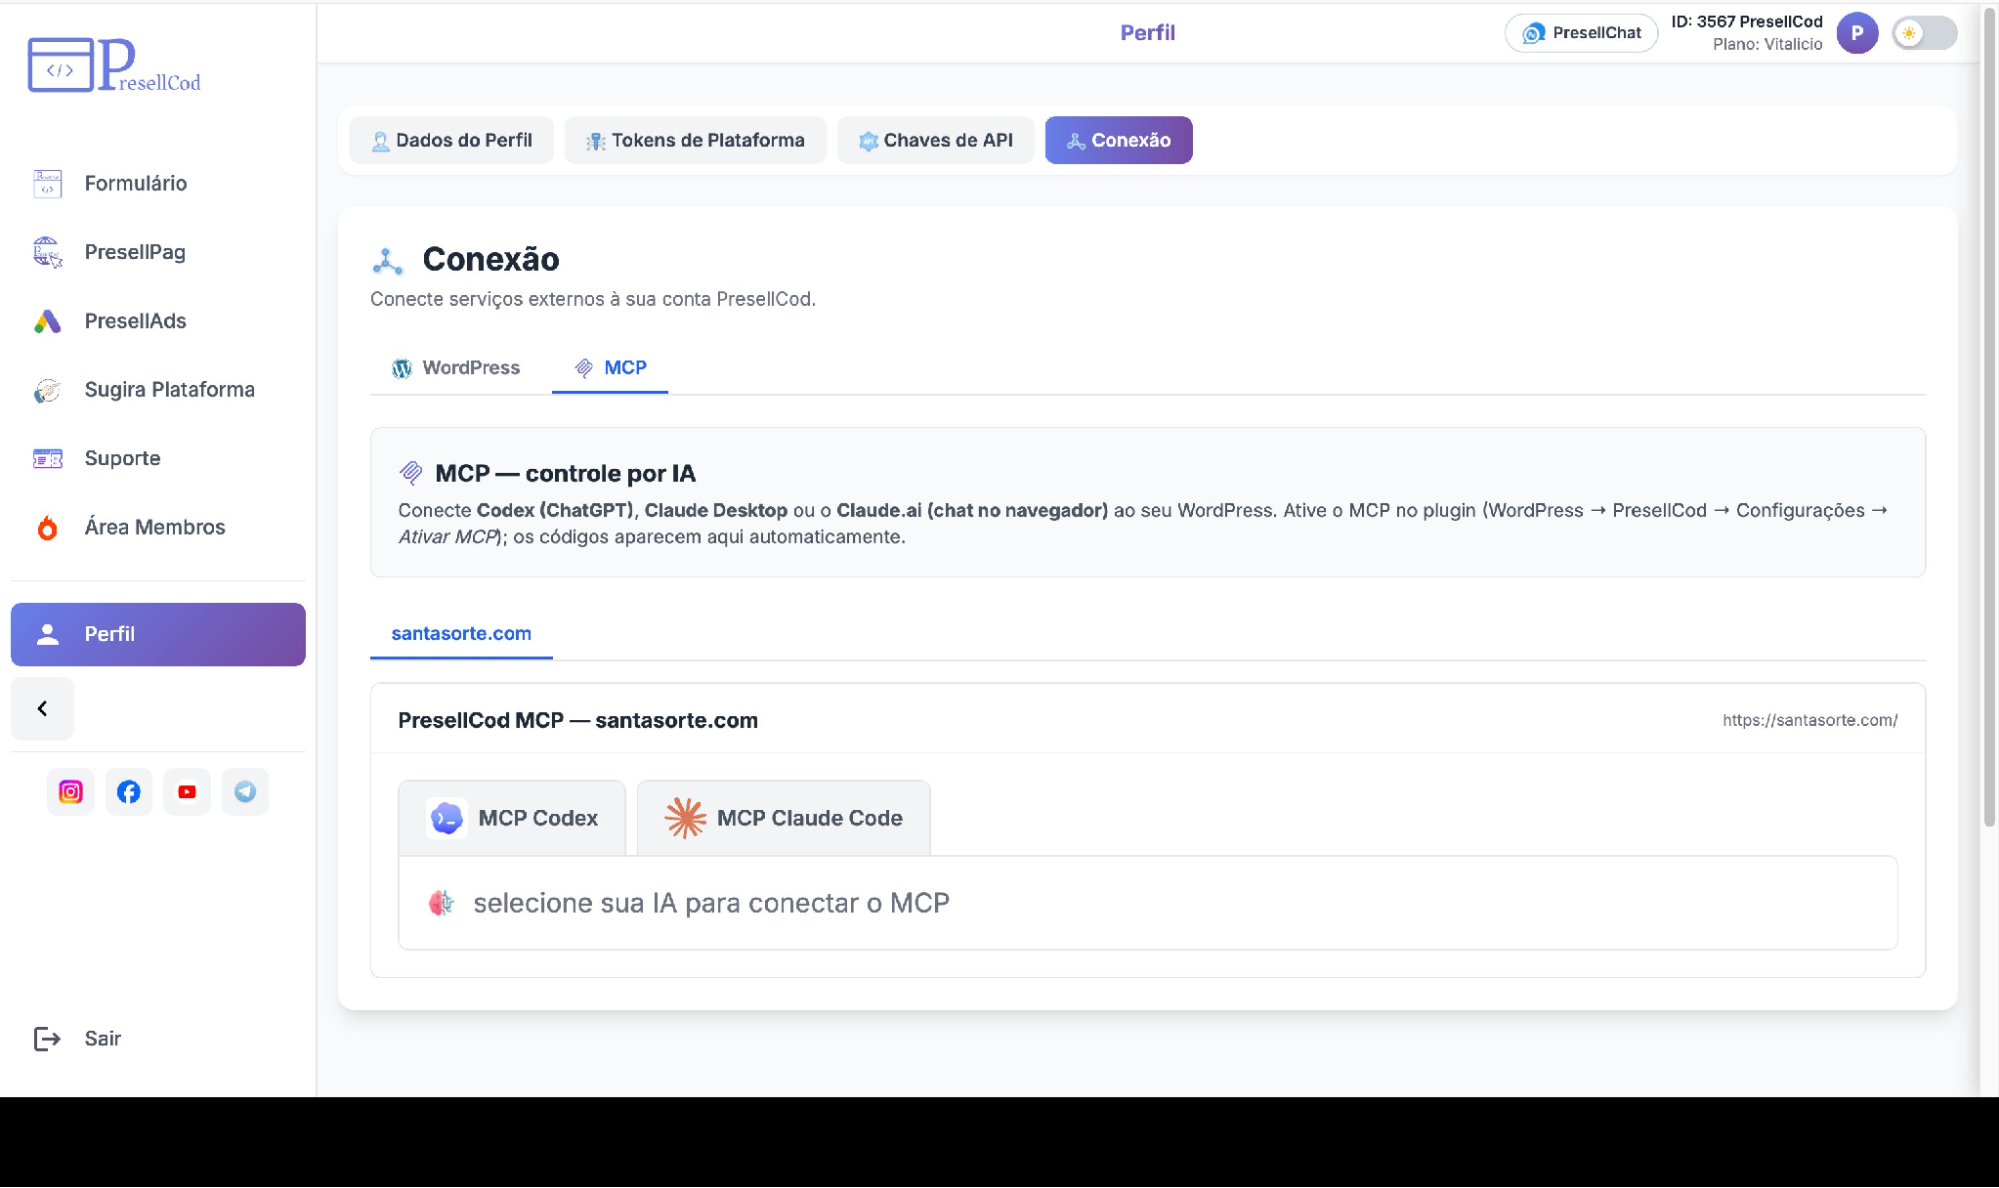
The MCP tab — connecting an AI assistant such as ChatGPT or Claude.
|
Why this helps productivity With AI handling the repetitive editing, you describe the outcome and review the result, rather than making each change by hand. This is useful for both groups: beginners get help producing pages, and experienced buyers offload routine edits to move faster. |
Training and support
If you get stuck at any step, three resources are available inside PresellCod.
- Member area — the Área Membros button in the menu opens the course, hosted on the platform where you purchased (Kiwify or Hotmart). It covers access, forms, platform setup, WordPress, and PresellPag.
- Video lessons — step-by-step walkthroughs for each network, organized by module so you can follow the part you need.
- Support tickets — open a ticket for direct help, or use the Telegram support channel for quicker questions.
|
Tip If the member area opens blank after login, refresh the page (F5). If your purchase does not appear, confirm you are logged in with the same email used to buy. |
Example workflow
Here is how a dr.cash affiliate can take a single offer from setup to launch using the steps in this guide. The same loop repeats for each new offer — only the inputs change.
- Create a form — in the Form Builder, select DrCash, set the country and language, and enter the campaign ID. Check it in the preview.
- Import a landing page — in PresellPag, paste the dr.cash template link and run Importação Completa.
- Edit the page — adjust the texts, swap images, connect the form, and update the links to the offer.
- Generate Google Ads assets — in PresellAds, enter the product details and generate keywords, headlines, descriptions, sitelinks, and snippets, in the right language for the market.
- Publish to WordPress — export the finished page to your connected domain.
- Launch the campaign — with the page live and the ad assets ready, set up the campaign and start sending traffic.
A media buyer running several offers repeats this sequence per offer, reusing the same form and page structures and changing only the product, copy, and links.
Conclusion
Used together, these tools turn campaign setup into a simple, repeatable workflow.
- Faster execution — forms, pages, ads, and publishing in one place.
- Less complexity — no coding or external help required.
- More time for testing and scaling profitable offers.
Whether you run one offer or many, the workflow remains the same and each launch becomes faster.Special Offer for Dr.Cash Affiliates
As part of the cooperation between dr.cash and PresellCod, dr.cash affiliates can access PresellCod starting from R$147 and receive an additional 10% discount using the exclusive coupon code: DRCASH10
Learn more and start your trial
Launch campaigns faster, reduce technical work, and focus more on testing and scaling profitable offers.
Want to start with nutra? Have questions about the case-study?
All the nutra is discussed now 24/7 in the telegram chat Nutra Affiliate Community
Quick help for beginners
Sweet cases for motivation
Exclusive bonuses from partners $$$$
Intelligent moderators and all support for affiliate network in one place